
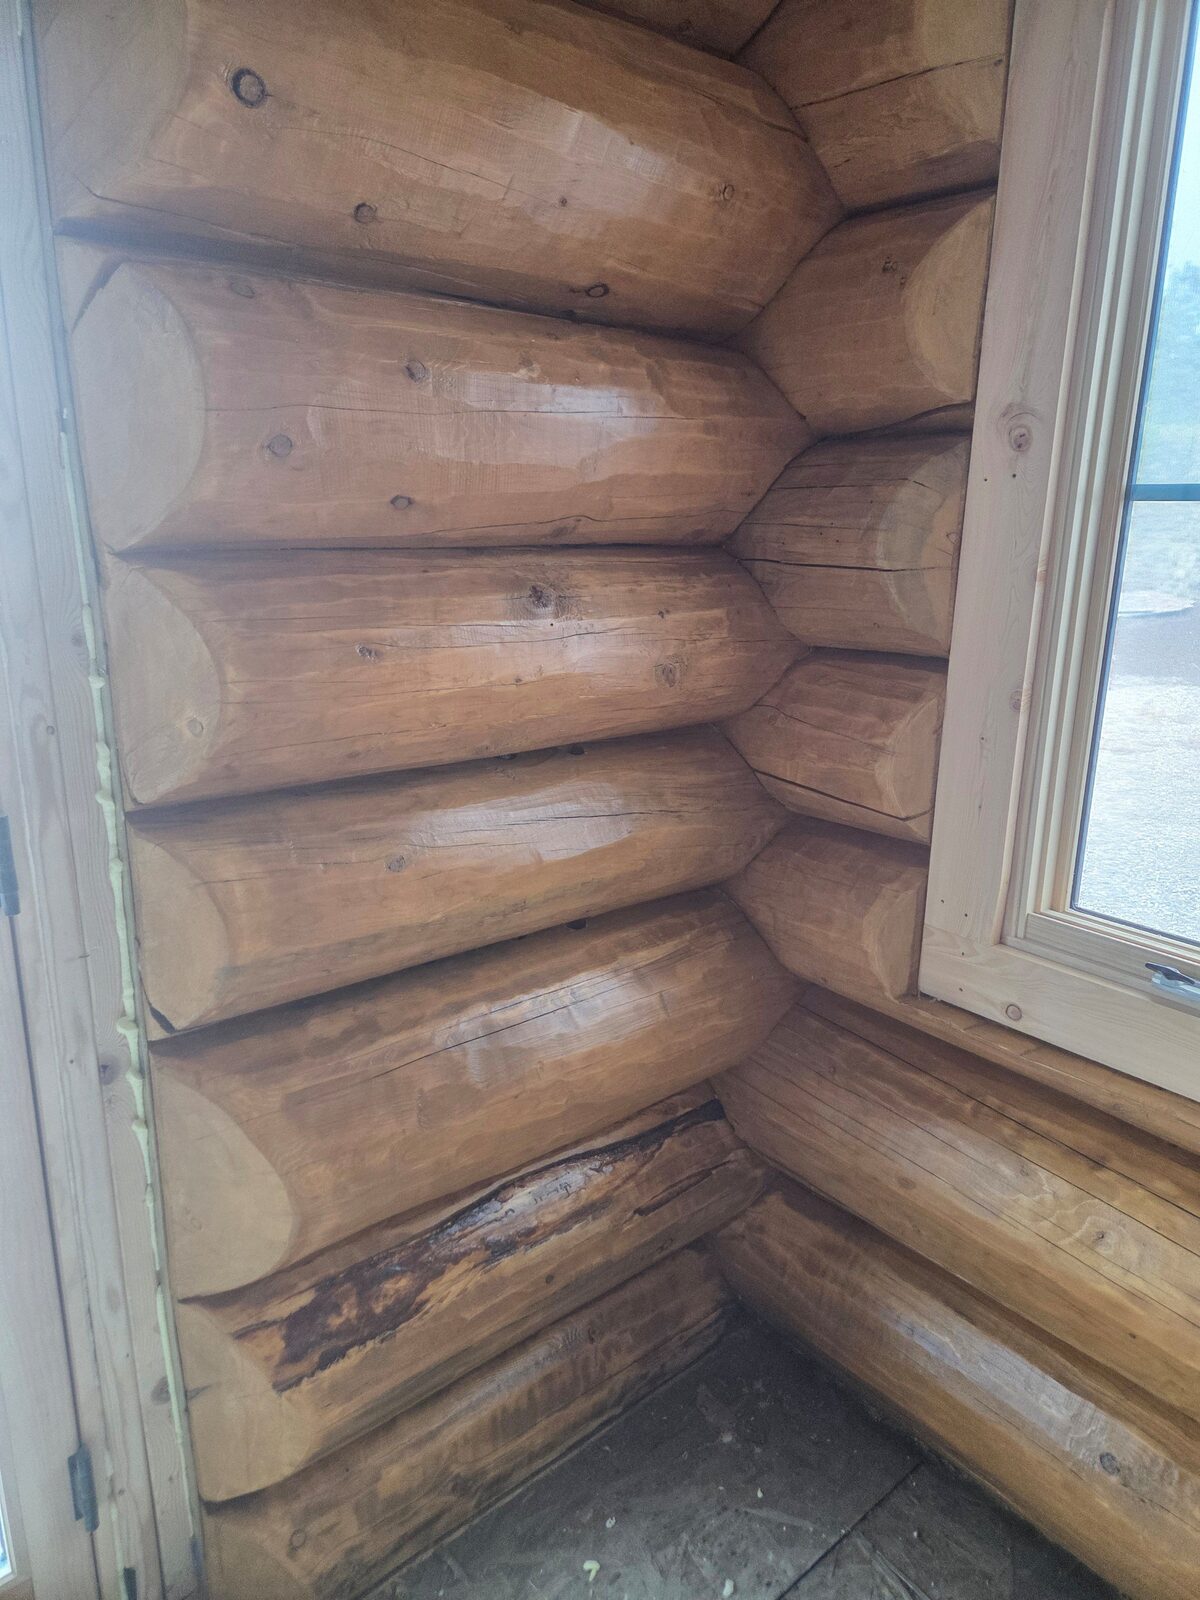
On this round-timber log cabin interior, we cleaned and prepped the walls before any stain went on, masked floors, windows and fixtures, then worked the stain into the round profiles by hand. Prep took longer than staining. Every log interior is walked and quoted on site in a free written estimate.
What the project was
This was a round-timber log cabin interior — full log walls, not flat paneling — that we cleaned, prepped and stained start to finish. The photo in our gallery is the finished room.
Round timber behaves nothing like drywall. There is no flat plane to roll, no clean inside corner to cut, and the surface changes texture every few inches: smooth on the face of the log, rough and open in the checks and the notched ends. All of that changes how much stain the wood takes and how fast it dries.
We handled the whole job ourselves, the way we handle log and timber staining generally. The person who walked the job is the person who did the work.
Why prep is most of the work on log walls
On a log interior, prep is where the finish is won or lost. Stain is transparent. It does not hide anything — it darkens and sharpens whatever is already on the wood. Dust sitting in a check, a greasy spot near the stove, a shiny patch where an old finish is still intact: all of it shows through once the stain goes on, and it shows worse, not better.
Logs also collect what a flat wall does not. Dust settles on the top shoulder of every round, where nobody wipes. Smoke and cooking residue build up over years. Around the ends and notches, the grain is open end-grain, which drinks stain far faster than the face of the log does.
So we budget the time on the front end. On this cabin, cleaning and surface prep took longer than putting stain on the wall, and that is normal for log interiors.
Cleaning and surface prep before any stain is applied
We start by getting the surface clean and consistent. That means working the whole wall — faces, shoulders, checks, notches and log ends — not just the parts at eye level, and letting the wood dry back out before anything is applied over it.
Then we sort out the surface itself. Rough spots, raised grain and any areas where the existing finish is uneven get worked back so the wood takes stain at a similar rate across the wall. Where a log has dark areas or old finish still hanging on, that section needs more attention, or it will read as a blotch once the stain hits it.
We test the stain on an inconspicuous spot before committing to the room. Log species, age and how much the wood has been exposed all change the final color, so the sample on the can is a starting point, not an answer.
Masking and protecting the room
Stain gets everywhere if you let it. Before any of it comes out of the can, floors are covered, windows and glass are masked, and fixtures, hardware and anything we are not staining get protected or removed.
That matters more on a cabin than in a bare room, because log interiors usually have exposed beams, stone, railings and trim close to the walls being stained — surfaces you cannot just wipe clean after the fact.
No mess left behind is a standard we apply to every job, from drywall repair to a full log interior. Floors covered, the site kept tidy as we go, everything put back at the end.
Applying stain evenly across round timber — the slow parts
Stain goes on round timber by hand, in manageable sections, following the log from end to end. The goal is a wet edge: you want to finish a whole log before the stain starts setting, because a dry lap line across a round face is obvious and difficult to fix later.
The slow areas are predictable. Log ends and notches soak up stain and go dark fast, so they get handled deliberately. Checks — the long splits that open along a log as it dries — hold extra stain, and if you don't work it out it pools and runs down the face. The underside of each round needs as much attention as the top, and it is the first place a missed spot shows once there is light in the room.
Then it dries. Cabin interiors are often tight and still, with limited airflow, so dry time between coats is longer than you'd expect from the label. Rushing a second coat is how a log wall ends up sticky.
Caring for stained interior timber in dry Colorado air
Northeastern Colorado is dry, and indoor air out here gets drier still once the heat runs through winter. Interior logs move with that. Checks open a little wider, and the wood on sun-facing walls — near south and west windows especially — will lighten faster than the rest of the room.
In our experience, the practical maintenance is simple: keep dust off the upper shoulders of the logs, watch the areas that get direct sun, and plan on refreshing those spots before the whole room needs it. Interior stain generally lasts a good deal longer than exterior, since it is not taking weather. How long depends on the wood, the sun exposure and the product, so we would rather look at your walls than quote you an interval.
If a wall has already gone patchy, that is still a prep conversation, not a stain conversation. Fixing it starts with evening out what is on the wood now.
What we'd need to quote a log or timber interior
To put a real number on a log interior, we need to see it. The things that move the price are the square footage of actual log surface, how many log ends and notches there are, whether there is an existing finish and what condition it's in, how much masking the room needs, and whether you want ceilings and beams done at the same time.
We also stain decks, fences, trim, doors, cabinets and saunas — we built and finished a wooden barrel sauna with benches and a wood-burning heater — so if there is more than one wood surface on the property, it is usually worth looking at them together in one visit.
Every job starts with a free, detailed written estimate before any work begins. The price stays as quoted unless you approve a change in scope. Our work is backed by a workmanship warranty. If you have a log or timber interior you want looked at, get in touch and we'll set up a time.
Frequently asked questions
Can you stain the inside of a log home, not just the outside?
Yes. This project was a full round-timber cabin interior — cleaned, prepped and stained. We do interior and exterior wood staining, including log and timber walls, trim, doors and cabinets.
Do you also stain decks, fences and saunas?
Yes. Our staining work covers decks, fences, log and timber walls, saunas, trim, doors and cabinets. We've also built and finished a wooden barrel sauna with benches and a wood-burning heater.
Do I have to move out while you stain the interior?
That depends on the size of the room, the product and the ventilation, and it is one of the things we go over during the on-site walk-through so you know what to expect before we start.
My log walls are blotchy from an older stain job. Can that be fixed?
Usually, but the fix is in the prep. Evening out the existing finish so the wood takes stain at a consistent rate is what corrects blotching — another coat over an uneven surface will not.
What areas do you cover for staining work?
Fort Morgan and the surrounding towns, including Brush, Wiggins, Log Lane Village and Hillrose. See our service areas for the full list.